Sunday, December 28, 2008

New Garden Toy for Christmas!

Late last night we got back into town, my wife and I spent the week in Wesson Mississippi and Northport Alabama visiting my relatives. After we got unpacked and visited with friends from out of town, it was to late for us to open our gifts from each other and gifts from her in-laws.

One of my gifts from one of the cousins got me an AeroGarden3! I put its together and so far I love it. I have been interested in these little guys for quite some time. If this smaller one works out as well I hope it does, I will spend the money on several other models I have had my eyes.

I put together the AeroGarden3 in less than 30 minutes. It took me longer to figure out where to put it than to assemble it. The first step is to assemble the arm for the light to the base and install the light bulb. Once the that is complete you then attach the base and grow surface to the system. After the system is setup, you will then add the grow seed pods, seed starting formula tablet, and water. Then plug the system in. The light source will run for 17 hours and be in the dark for 7 hours.

So far, the only thing, I do not like about will live with is the water pump can be loud if you are in a quiet room, you will hear it. But more to come on that later on.

As time goes on, I will report my findings. Below you will find pictures of the assembly process and the completed unit.


Join Green Thumb Sunday
Join

Sunday, December 7, 2008

Overwintering is not fun...

Not sure why this didn't post earlier, but I will repost again...

Last weekend, came time to overwinter all my tropicals and start some more cuttings. I converted a wasted space in my garage into a pepper storage area, use my side of the garage to overwinter tropicals and some Brug cuttings, and put the rest on my covered porch.

As for the pepper storage, eventually I will have this up with better lighting but for now this will at least keep them alive and finish off the last of the peppers.

 
The above picture is a small window pot filled with peat and perlite for a batch of cuttings that I could not fit into my rooting chamber. What I did was take three wire coat hangers and cut them down to size and stuck one end on one side and took the other and looped it over. I set one support on each side and one in the middle. Hopefully they metal will not rust before the plants root. 
  
Pepper Plant Storage 
 

This is where my car is suppose to be parked. It looks like I will have to come out to a cold car in the morings.


Join Green Thumb Sunday
Join

Wednesday, December 3, 2008

Its a been a while since my last post...

Well, its been  while since my last post, and I am sorry. A lot of things have happened in my life lately and I just haven't time nor the money to work in the garden.

First I lost my job back in October and I have not found steady employment yet. Second my grandmother had another stroke and passed away 2 weeks after losing my job. But on the good side a friend of my offered me a job in the audio/visual field and some video shooting running second camera and assistant for the lead cameraman. I was also offered some constulting work for an internet web design company ran by one of my gardening friends on Garden Web as well. So if you need any web work or need a new host let me know...

Also I just harvest a lot batch of peppers today and have about 15 more that will be ready to harvest. Unfortunally I do not know what they are. All the tags were lost when I moved the pepper to the side yard to fend for themselves after they did not produce any peppers this year. I figured I would keep the survivors and start some news ones next year. It looks like most of them survived and even produced. If you know what kinds they are let me know.

Thanks guys.


Sunday, October 26, 2008

Pride of Barbados


Caesalpinia pulcherrima 'Pride of Barbados'


Join Green Thumb Sunday
Join

Tuesday, October 14, 2008

Japanese Tea Gardens In San Antonio

Last weekend my wife and I spent the weekend in San Antonio, TX for her 5 year reunion at Trinity University. Between alumni events, my wife and I were able to sneak away and spend a few hours at the Japanese Tea Garden right across the highway from the university.

Currently, the gardens are being renovated, and you can see how hard they are working at keeping and making this a wonderful place to visit. Of course we chose a time of year when most of the flowers were
 already spent but it was still very beautiful and I will planning to visit next spring, if we have the time. My favorite part of the garden is all the hardscaping and the way the park is sunken into an hold rock quarry.

History: A complete history can be found at Japanes Tea Garden History.

In 1881 the San Antonio Water Works Company, through its president, George W. Brackenridge, donated 199 acres to the City of San Antonio to be used as public park. In 1901 the park was officially opened and today still holds the name of Brackenridge park. At this time their was a working operating rock quarry west of the park on land owned by the City of San Antonio. The stone cutters had been leasing this land since the mid 1800s. Then in 1908 Quarry company closed down the site after it needed to bring in rail lines to expand the project. Instead they purchased a new site. 

In 1915, another 11 acres were donated, the land immediately adjacent to the abandoned quarry for a city park.  City Parks Commissioner, Ray Lambert came up with the idea of a lily pond would later became the Japanese Tea Garden.  From July 1917 and May 1918, the City used prison labor to turn the quarry into complex that had walkways, stone arches bridges, an island, a Japanese pagoda. Local residents donated bulbs, exotic plants were donated by local nurseries, and the roof used palm leaves from the palm trees in the city parks. Ray Lambert only spent 7,000 to create his ideas 


Over the years, the park made changes to the design and improvements were made. Currently this is what the park looks like as of October 10th, 2008.


Sunday, September 28, 2008

Another Busy Weekend

This weekend was a busy one. I created and finished up on my new Iris bed. I am not sure I like it and I think I will re do the bed next weekend. I made two trips to the dump for more mulch, finished laying mulch down in the new backyard garden, gave my new lawn mower a tune up, and rebuilt the broken door casing.

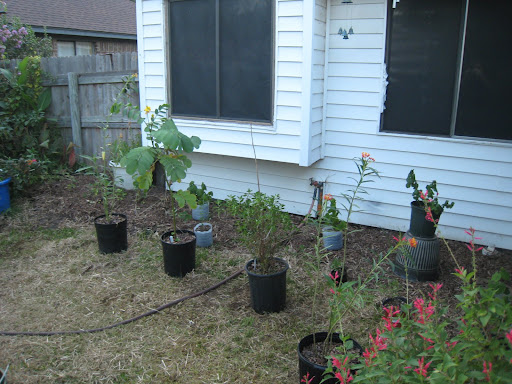
Here are some new pictures of the new flower bed in the back. Its not done yet and the plants will not be planted until I decide that I really like the layout. I think I may just leave them potted up and put them in garage for the winter and plant them next April.

The larger plants in the front are milkweed, candle stick, and cigar plant. These will be moved out to another spot but right now they are still small and will not block the view of the other plants.

The main layout will be Lantana, Turks Cap, Red Saliva, Lady in Pink Saliva, and Pine Apple Sage. I then will look for some sort of vine to climb the trellis that can take part shade and noon to 5 PM west sun. I will also be repotting all of the smaller pots.


Join Green Thumb Sunday
Join

Saturday, September 27, 2008

Went To the City Dump Today

Lately I have been renovating the  beds in  my yard  and creating new ones. Once I complete those bed, I mulch the bed with hardwood mulch. Some cities now have a recycling of hardwood program. Some cities have better programs and some have none. If you are looking for free mulch and other garden products, check out your local city programs.

As you can see the City of Garland has a large pile of mulch. a few months ago this pile was a lot larger. There are several other areas with smaller piles. I am not sure what these piles are for but they are deep in organic matter but, they were set to side of the pit. Hopefully Garland will start a better program and start a compost program.


Sunday, September 21, 2008

Worked On New Flower Bed This Weekend!

Last April I bought a flat of Lantanna and never found a place to plant it. This weekend I finally found a place. I planted in a spot that gets sun most of the day but shaded from 4 PM till dusk. The plants are in bad shape but they should recover. Hopefully the will make it through this winter. If do not, I can get some more.

First I dug out the grass and weeds from the area. Then dug out about 3 inches and added six inches of top soil, landscaper's mix, compost, cotton burr compost, blood meal, bone meal, and lots of donkey manure. And topped with city mulch.

 
Of course this part of the bed is not completed. I ran out of mulch. Next weekend I will load of the blazer with a large load of mulch. Once completed I will show the completed project with yard clean and the bed finished. Next season I plan to plant 3 to 5 Turks Caps and followed by some columbine (maybe) or something a butterfly attracting plant that take partial shade. And on the side next the porch it gets sun most of the day. I will plant Red Saliva and Lady in Pink Saliva.  With large vine with red or yellow flowers growing up it.

Thursday, September 11, 2008

Some New Performers In The Garden


Tecoma stans 'Gold Star'

I picked this plant up from Lowe's clearance section. I only paid a Dollar. In a few weeks it will be covered with blooms.


Malvaviscus Arboreus Var. Mexicanus 'Mexican Turk's Cap'


Salvia 'Lady In Pink'


Asclepias Curassavica 'Mexican Milkweed'


'
Asclepias Tuberosa 'Yellow-Flower Butterfly Weed'

Wednesday, September 10, 2008

How To Build A Propagation Station

Previously I posted some pictures of my propagation stations as promised for Wicket Gardener. Today since it rained most of the day and the garden was flooded there wasn't much for me to do today. So I took some cuttings from my Light Pink Oleander, some Red Oleander cuttings I got last weekend from my in-laws, and Purple Crepe Myrtle cuttings. Instead of just putting them in water or putting them in some peat and keeping the cuttings watered, I did some research and came up with some ideas that a lot of people say they have had with great success. I decided I would take all the good ideas and make a large station that can be broken down easily and put back together quickly.

My New Propagation Station:
Supplies:

1 large 64 Quart Clear Rubbermaid or like container. I went to Wal-Mart and I picked up the container that is all clear and haslocking sides for $8.

Depending on the size 1 to 4 inch terracotta pots. They need to be untreated and no glaze on them. Water needs to seep out. $. 70 x3

Peat, soil, or seed starting mix. Need enough to cover the soil up to the lip of the terracotta pots or 4 inches material to cover the bottom part of the cutting.

Pruning shares

Silicone if there are water holes in the pots.

Cuttings

After gathering up the supplies, I use silicone to seal up all the watering holes. I then let it dry for about 15 minutes. While the pots were drying, I added a mixture of peat, perlite, vermiculite and some left over seed starting mix I had left over to the container. After getting the medium in the container, I then watered down the medium. The medium needs to be just wet enough to be sticky not, soggy. That will cause your cuttings to start rotting instead of growing.

Once you have all the medium in place I put the pots into the mix. You want to leave some of the medium on the bottom the container. Then fill the medium around the pot up the lip of the pot. Careful not to get anything into the pot. This will faul the water faster.


After adding the pots, comes the fun part. It's time to make more plants. First I started with the Light Pink Oleander. Step one was to take 6 to 8 inch cuttings from the new growth. I then made the cut at a 45 degree angle near the first node. I then stripped off leaves and flowers from the first 3 or 4 nodes. I then gave the cuttings a hair cut. This will conserve water in the cuttings and the cutting will spend more time working on roots than maintaining green. Once the cuttings are ready to go into the peat, I then dip each cutting in root hormone. I then took my finger and punched a 3 inch hole into the medium. I then did this about every 2 to 3 inches apart . Once the holes were ready I added my cuttings with root hormone to the container. When I was finished with that section I then added some plant markers of what the plant is, color and when I started the rooting process. After I finished that plant, I then repeated the same steps for the Red Oleander cuttings.

As for the Crepe Myrtles, the process is about the same. I took green cuttings and stripped away flowers, leaves, and extra branches. I then put the cuttings at 6 inches with a 45 degree cut at the first node. Once the cuttings were prepped I then followed the same processes as the Oleander.

Both Oleander and Crepe Myrtles root fairly easily, I choose this method as a test because I know I can root them in almost any condition. Second these were the only plants that I had on hand to test and I know I will need these plants by next spring, I know people will want these, if I made to many.

If this works, I will purchase 1 more of these and use to root some other plants when needed. I will also purchase smaller boxes to use for some of the smaller items, such as propagating house plants and other smaller cuttings.

After the cuttings take root, I will then move the cuttings from the bucket once I see enough root growth or there is more top growth. I will then pot these plants in whatever pot sized is needed for the plant. Usually a 6 inch pot or 10 inch pot. It all depends on the roots and how much I have to work with. Once its transplanted, its watered with seaweed emulsion and root stimulator. I will then place them on my hardening off shelf. The shelving system will have more light on them later in the year. Once I have my rooted plants, I will have to have somewhere to over winter them. They will live on the lighted porch until next spring.

Sunday, September 7, 2008

Just Downloaded Scribefire

Just testing my new blog editor. I downloaded ScribeFire to see if it works better than blogger editor.

Saturday, September 6, 2008

Propagation Station and Over Wintering Project

Last year, before our cold winter started I took my screened in porch and lined it with clear well almost clear plastic shower currents and clear plastic drop cloths. I then setup a plastic folding table for seed trays and lined up cheap work shop lamp fixtures w/ full spectrum and grow lux sunshine bulbs. As my tropical plant collection grew I setup some cfl spot lights and lined my porch w/ them. As you can see some of the tropicals bloomed through out the winter. When the weather dropped below 35 degrees I setup a space heater and ran it on off most of the night and early morning hours. This kept the temps in about the 50s and when the temps dropped into the 20s the temps on the porch stayed around the mid 40s until mid day. This worked very well, this year I plan to line the porch with a thicker liner and run some more lights. Hopefully this year I will still have room to use my porch furniture.

The last few pictures are of my seed closet. I took and old closet in my garage and ran some cfl light fixtures on each shelf and lined aluminums foil. These shelves will hold 2 72 Bio seed starting trays. Sometime this winter I will replace the foil with mylar and run some ventilation in the cabinet. Right now my grow closet will reach the high 90s in the winter and as them gets warmer the temperature in the closest grows as well.

I will post a walk through sometime in the near future on this project.