Wednesday, July 30, 2008
Another New Friend in the Garden
Monday, July 28, 2008
Got A New Composting Bin Today
 Sunday afternoon we were out looking for some lawn furniture and we stopped by WalMart to check and see what they had left. Since its almost the end of the season, Walmart had dropped the prices on most of the items in the garden section. By the register they had an end cap display for the Super Composter for only $45! Walmart's and Sams both had these composters for 80+ through out most of the season.
After looking the display model over, I decided it was worth a try and it is a lot nicer than my are.
The composter is packaged in shrink rap and the instructions are pictures only on the back of the label. So do not damage the label while opening. The first step was to seperate the parts and make sure I had all the parts. Next I put the for sides together. Next add the corner brackets. Followed by installing the door and hinges. Putting this together will take about 30 minutes or less to put together. It is poorly designed and I would love to able to have screwed/nailed something together. The composter is injected molded thick durable plastic. But the sides do not line up well and the looking tabs will lock completely. The lid is durable and has sturdy spring loaded hinges. Once the composter was in place it looked real good.
 Today I added a large bag of fresh grass clipping, shredding paper, coffee grounds/filter, bone meal, blood meal, and alfalfa pellets and mixed in. It is to early to recommend this item. I will see if this composts faster than my homemade units.
I will keep everyone up to date on my findings.
Sunday, July 27, 2008
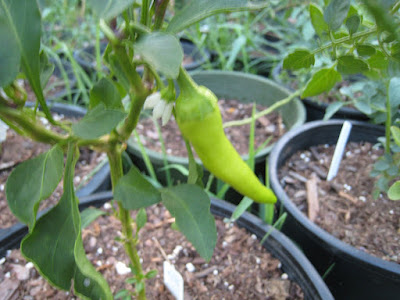
First Pepper Of The Season!


Join
Saturday, July 26, 2008
Created Another New Bed Today
 For the last few weeks I have been trying to figure out what was eating my garlic bulbs. Last night I caught the thief. It was my little lazy garden helper! She such a traitor. I found her with a face full of mud and doggie breath that smelt of garlic!
So to fix that I went to the local big box store and bought 6 cinder blocks and set them under my garlic pots. This will put the post just high enough that she can't jump up and get to them. If she does the pots will fall over and she will get caught in the act and I can train her not to go over there.
 Before starting my project I tied back the Oleander. Its taking over the whole area. But that project is for another post. Sorry guys!
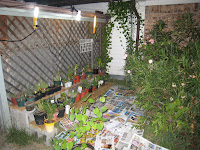
When I went out work on the yard, I noticed that it was time to move all the plants and cut the high grass down. I really HATE this. Moving a hundred plus plants around in 95+ degree weather sucks! So at 8:45 PM, just after dark, I decided to setup some lights and turn this area in a bed with hardwood mulch from the city green project. First I laid down newspaper and then threw over a hundred gallons of hardwood mulch over the newspaper.
 Once that was completed I then sprayed down the bed with an insecticide to kill any bugs that got into my mulch from the compost area. When I hit the big box store tomorrow I will get another large bottle and spray again.
I had plenty of light for light duty work. I setup 2 shop trouble lights and a clamp on Desk lamp to light up my work area. Tomorrow if I have the time I may setup some more yard lighting. I have a couple of Christmas lawn decoration spot lights that will work great to light up the dark spots in the yard so I can work past dusk when it is cooler.
After getting my area of mulch down, I placed 6 cinder blocks down and put 3 pots down on top of them. I think once I get the Oleander tied back I will put some stepping stones where the pots are and push the garlic back a few feet and add some plantings around the pots to high those ugly blocks. Maybe some lantana or something that trails.
Once I get the bed finished and I have more mulch I think I will pull my herb garden up and complete the project under there as well. Eventually this bed will rap around the entire Oleander bed and remove most of the grass in that area.
Wednesday, July 23, 2008
Update on my Veggies and the garden
Right now the bed currently has some English Ivy that is has some starts in it and ground cover that produces little purple flowers. It starting to take up a large part of the bed. I may pull that up once I get the bed established. I planted Ajuga that I received from a gardening friend in Copper Canyon and some coleus that I never got around to planting earlier this year. I eventually want to fill the bed w/ some ferns.
I did lay a soaker hose down. It took several hours to get it right. I do have several spots that stay dry but, that will be that way until I can raise and level the bed. But thats a different story.
On Sunday I mixed of some compost mix and added to my veggies. This mix has 3 parts donkey manure, 2 parts mushroom compost 1 part peat moss, 1 part landscaping mix, I then added several large hand fulls of bone meal, blood meal, and alfalfa meal and mixed it up. Took that mix and added to my winter squash, sweet potatoes, cuccumbers, zucchinis, tomatoes, and peppers. I added this mix to around the plants and worked it into the top layer and covering all surfacees for each pot. I then watered each pot. Today I checked on the plants and they are greener and look healthier. Tomorrow I will post pictures of my plants.
Wednesday, July 16, 2008
I Have A New Guest In The Garden!
Sunday, July 13, 2008
Tulum Mexico
Green Thumb Sunday

Join
Saturday, July 12, 2008
Tyler Rose Garden May 17th 2008

I spoke with some of the locals and they said we came about a month early. They did mention that the garden will be out of the growing season and will be blooming by the time Rose Fest starts!I promise better pictures and better review.
Friday, July 11, 2008
tylerrose.JPG
Just setup Flickr. I am testing their posting feature with blogger. I am not sure I like. Their website is very slow and I haven't the time nor the patient to figure how to create linkable sideshows or how to post from their posting feature with multiple pictures. I as for this picture I will post more about this photo album tomorrow
Wednesday, July 9, 2008
Giant Cloneflower Finally Bloomed!

Just broke 1000 Page Views
Monday, July 7, 2008
Went to Minneapolis for the weekend!


